
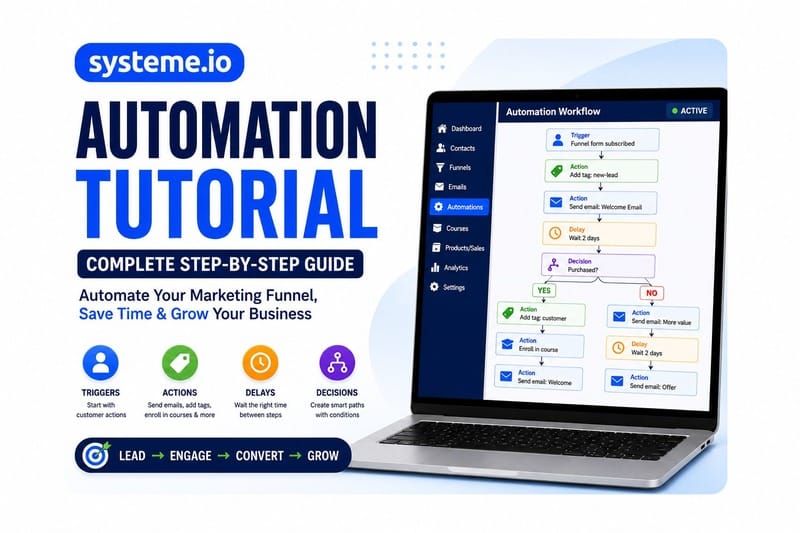

Systeme.io Automation Tutorial: A Complete Step-by-Step Guide to Automating Your Marketing Funnel
Systeme.io Automation Tutorial: Introduction
Running an online business often means handling the same repetitive tasks again and again: sending welcome emails, following up with leads, assigning tags, enrolling customers into courses, delivering products, moving prospects through a sales funnel, and communicating with customers after a purchase.
Doing all of this manually can consume a significant amount of time. Systeme.io Automation Tutorial
This is where Systeme.io automation can help.
Systeme.io provides automation rules and workflows that allow you to create automated sequences based on actions taken by your contacts. For example, when someone submits a funnel form, purchases an offer, clicks a link in an email, completes a course, or receives a tag, you can automatically trigger another action.
According to Systeme.io’s current documentation, its workflow system allows you to combine triggers, actions, decisions, and delays to create more sophisticated automated customer journeys.
In this Systeme.io automation tutorial, we will walk through the fundamentals of automation, explain the difference between automation rules and workflows, show how to build practical automations, discuss pros and cons, and provide examples you can adapt to your own business.
Whether you’re a beginner, freelancer, coach, course creator, consultant, digital marketer, or small-business owner, this guide will help you understand how to build a more efficient automated marketing system with Systeme.io.
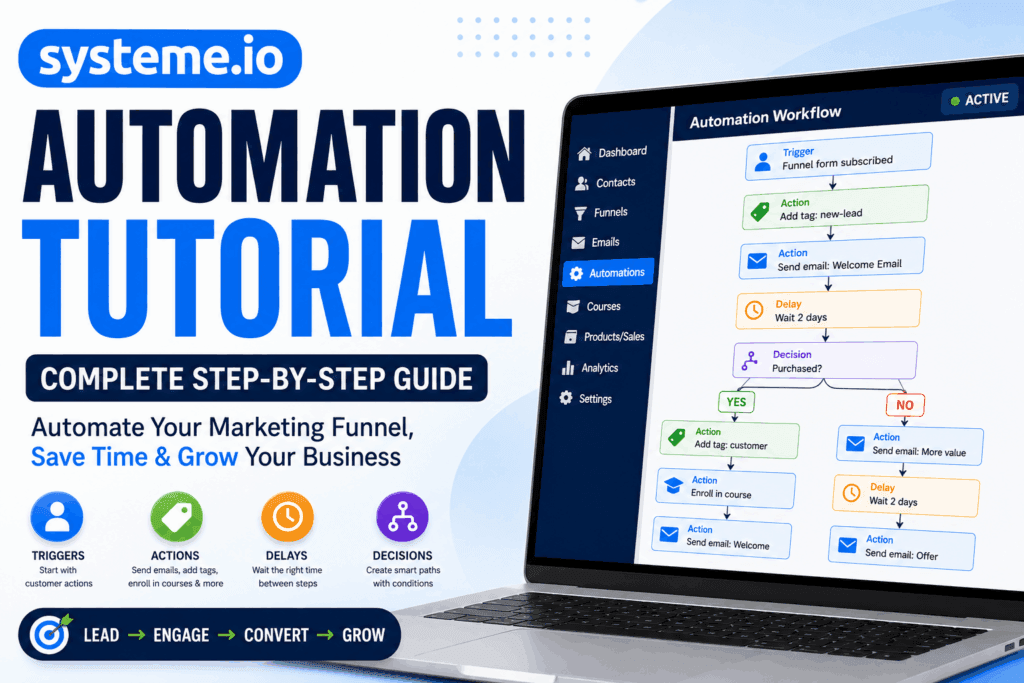
What Is Systeme.io Automation?
Systeme.io automation is a system that allows you to automatically perform actions when a specific event occurs. Systeme.io Automation Tutorial
The basic concept is:
Trigger → Automation → Action
For example:
Visitor submits opt-in form → Add tag → Send welcome email
Or:
Customer purchases product → Add customer tag → Send email → Enroll in course
Instead of manually checking your contacts and performing each task, you configure the automation once and let Systeme.io execute the appropriate actions.
Systeme.io currently offers two major ways to create these automated processes:
- Automation Rules
- Workflows
- Systeme.io Automation Tutorial
Both can automate tasks, but workflows are designed for more complex sequences involving multiple steps, decisions, and delays.
Why Should You Use Systeme.io Automation?
Before creating your first automation, it is important to understand why automation matters.
1. Save Time
Imagine receiving 100 new leads in a week.
Without automation, you might need to:
- Add tags manually
- Send welcome emails
- Subscribe contacts to campaigns
- Track customer activity
- Send follow-up messages
- Enroll customers in courses
- Systeme.io Automation Tutorial
Automation can handle many of these repetitive tasks automatically.
2. Respond Faster: Systeme.io Automation Tutorial
When someone subscribes to your lead magnet, you don’t want to wait several hours before sending the promised resource.
An automation can respond immediately after the appropriate trigger occurs.
3. Improve Follow-Up
Many leads don’t purchase immediately.
Automation allows you to create structured follow-up sequences that continue communicating with prospects without requiring you to manually send every message. Systeme.io Automation Tutorial
4. Deliver Products Automatically
If you’re selling digital products or courses, automation can help connect a purchase with actions such as tagging customers, sending emails, and granting access to resources.
5. Create Personalized Customer Journeys
Not every customer behaves the same way.
With decisions and conditions in workflows, you can create different paths depending on customer behavior. Systeme.io Automation Tutorial
For example:
Lead → Email → Clicks offer → Add interested tag → Send targeted follow-up
This creates a more personalized experience.
Systeme.io Automation Rules vs. Workflows
One of the most important concepts in this Systeme.io automation tutorial is understanding the difference between Rules and Workflows.
What Are Automation Rules?
Automation Rules are useful when you want to connect a specific trigger to one or more actions.
The basic structure is:
Trigger → Action
For example:
Trigger: Funnel form subscribed
Action: Send email
Systeme.io’s documentation explains that automation rules can be created from Automations → Rules, where you select a trigger and then configure the action that should occur. Systeme.io Automation Tutorial
Automation rules are particularly useful for straightforward tasks.
Examples
You could create a rule such as:
- Form submission → Add tag
- New sale → Send email
- Tag added → Subscribe to campaign
- Course completed → Send email
- Email link clicked → Add tag
- Systeme.io Automation Tutorial
For simple automation, rules can be easier to understand and maintain.
What Are Systeme.io Workflows?
Workflows are designed for more advanced automation.
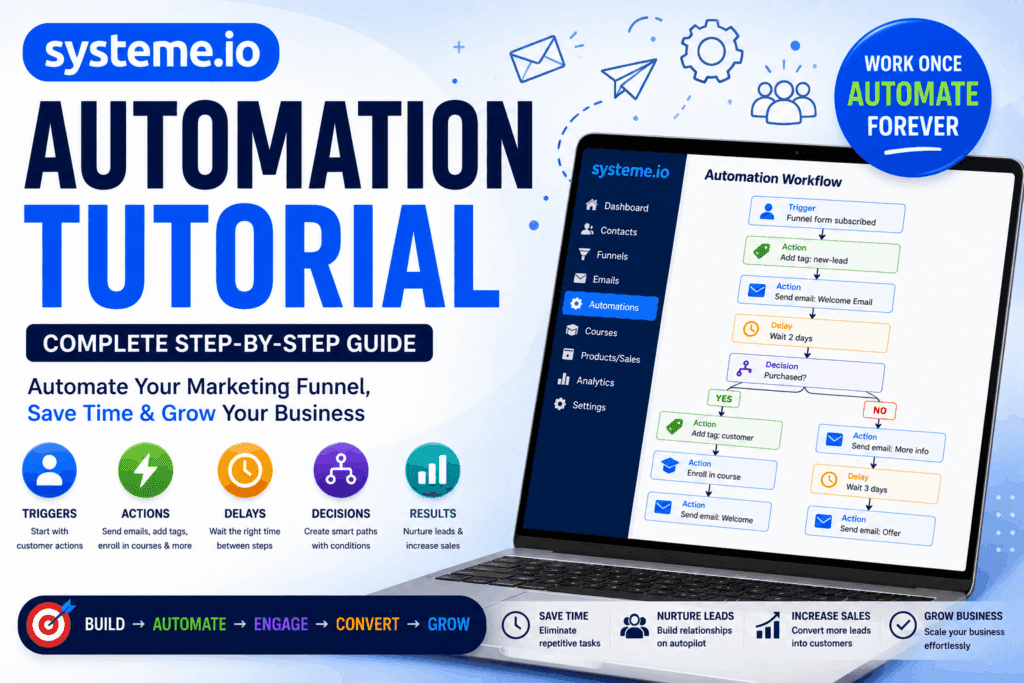
Instead of having only one trigger and an action, you can build a visual sequence containing:
- Triggers
- Actions
- Delays
- Decisions
- Multiple paths
- Systeme.io Automation Tutorial
Systeme.io’s current workflow documentation lists actions such as adding or removing tags, enrolling contacts in courses, subscribing or unsubscribing contacts from campaigns, sending emails, sending SMS, granting community access, sending webhooks, adding Google Sheets rows, and moving contacts to pipeline stages.
This makes workflows especially useful when you want to build complete customer journeys.
For example:
Lead subscribes → Add tag → Send welcome email → Wait 2 days → Send educational email → Wait 3 days → Check condition → Send different follow-up
That is much more powerful than a simple one-step automation. Systeme.io Automation Tutorial
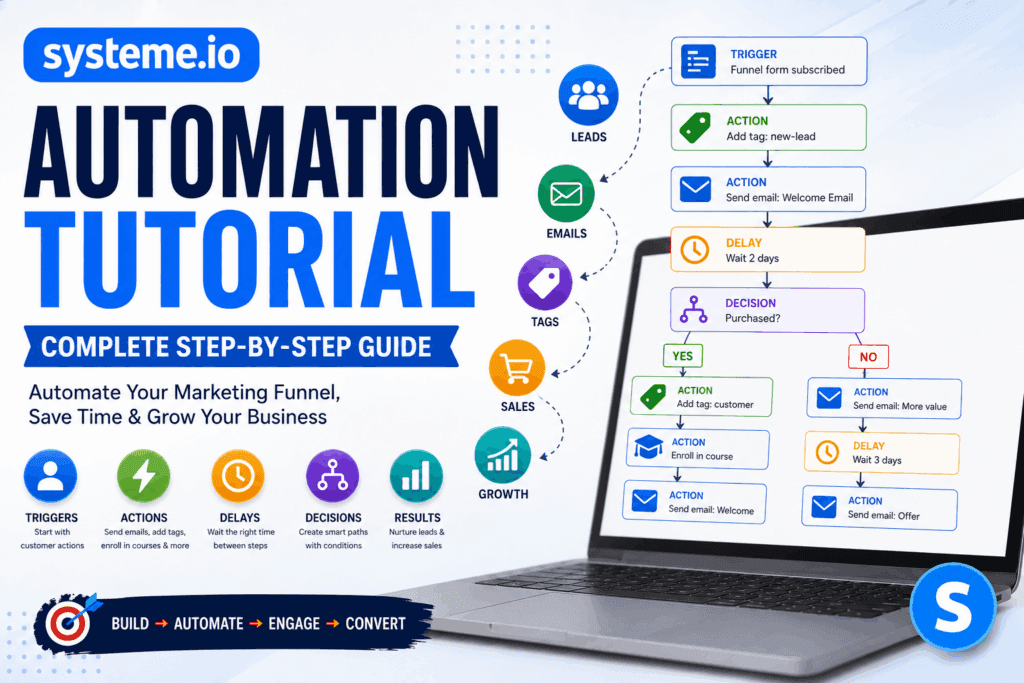
How to Create Your First Systeme.io Automation Rule
Let’s start with a simple example.
Suppose you have an opt-in page offering a free PDF guide.
Your goal is:
Visitor submits form → Send welcome email
Step 1: Log in to Systeme.io
Log in to your Systeme.io account and open your dashboard.
Navigate to the Automations section. Systeme.io Automation Tutorial
Step 2: Open Automation Rules
Go to:
Automations → Rules
Then choose the option to create a new rule.
Systeme.io’s documentation confirms that automation rules are created from the Automations section and use a trigger/action structure.
Step 3: Select a Trigger: Systeme.io Automation Tutorial
A trigger determines when the automation should start.
For our example, choose a form-submission trigger associated with your funnel page.
A trigger might be:
Funnel form subscribed
The exact available trigger options can depend on the feature you’re using.
Step 4: Select an Action
After choosing the trigger, add an action.
For example:
Send email
You can then create or select the email you want to send.
Systeme.io Automation Tutorial
Step 5: Save the Rule
Review the trigger and action carefully.
Then save the automation rule.
Now, when a contact performs the selected action, the configured automation can run.
How to Create a Systeme.io Welcome Email Automation
A welcome email is one of the easiest and most useful automations to build.
Imagine someone downloads your free ebook.
Your automation can be:
Form Submitted → Send Welcome Email
Your email could contain:
- A welcome message
- The promised resource
- Your website
- A helpful article
- A next step
- An invitation to learn more about your service
- Systeme.io Automation Tutorial
The goal is not simply to send an email.
The goal is to start a relationship with the new subscriber.
How to Create an Automated Email Sequence
A single welcome email may not be enough.
You can create a series of emails that are sent over time.
Systeme.io supports email campaigns that can be used for automated email sequences. Its documentation describes using an automation rule to subscribe contacts to a campaign after a trigger such as a funnel subscription, sale, or tag addition. Systeme.io Automation Tutorial
A simple sequence could look like this:
Day 0
Welcome email
Day 2
Educational email
Day 4
Problem/solution email
Day 6
Case study
Day 8
Product introduction
Day 10
Offer or call to action
This approach allows you to nurture leads instead of immediately trying to sell something.
How to Use Tags in Systeme.io Automation
Tags are extremely useful for organizing contacts and creating targeted automations. Systeme.io Automation Tutorial
For example, you could create tags such as:
new-leadebook-downloadedinterested-coursecustomerwebinar-registeredhigh-intentcourse-completed
A tag can help you identify what a contact has done or what type of communication they should receive.
For example:
New lead → Add new-lead tag
Later:
Tag added → Subscribe to email campaign
This allows you to build automation systems around contact segmentation. Systeme.io Automation Tutorial
Systeme.io supports both Tag added and Tag removed as workflow triggers, with the important condition that the tag event occurs after the workflow has been activated.
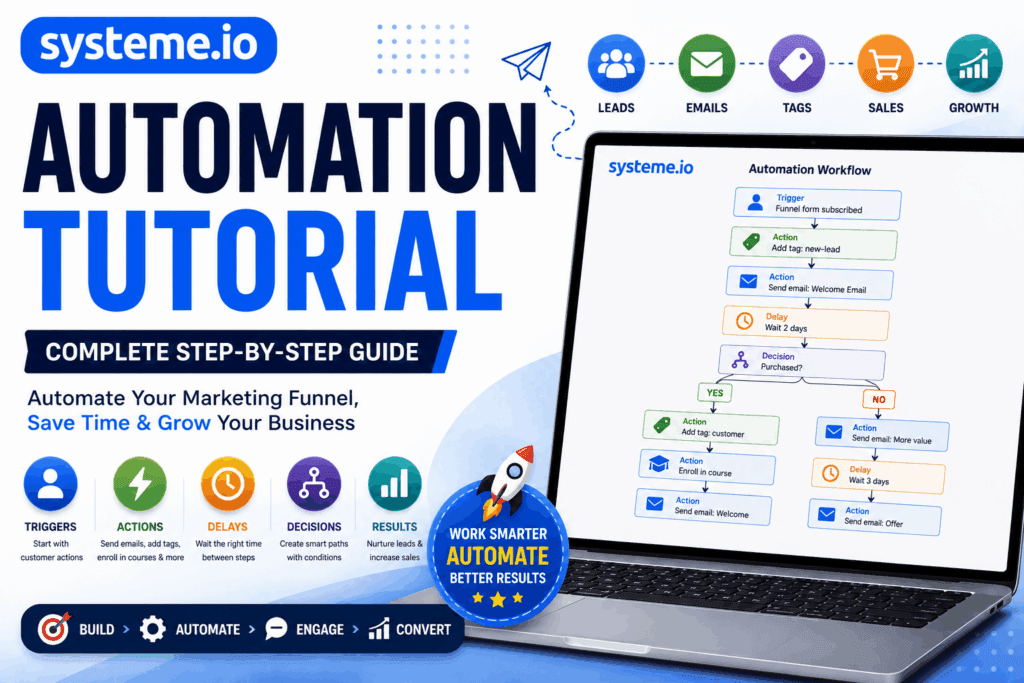
How to Create a Systeme.io Workflow
Now let’s build a more advanced automation. Systeme.io Automation Tutorial
Suppose you have a digital marketing course.
You want the following customer journey:
Customer purchases course
↓
Add customer tag
↓
Enroll customer in course
↓
Send welcome email
↓
Wait
↓
Send getting-started email
↓
Check course progress
↓
Send appropriate follow-up
This is better suited to a workflow.
Step 1: Go to Workflows
Navigate to:
Automations → Workflows
Then create a new workflow.
Give your workflow a descriptive name.
For example:
New Course Customer Onboarding
Systeme.io’s current workflow setup starts by creating a workflow and then defining its triggers and actions.
Step 2: Add a Trigger: Systeme.io Automation Tutorial
Click to create your first trigger.
For this example, select:
New sale
Then select the relevant offer.
Now the workflow knows when to start.
Step 3: Add an Action
Add an action such as:
Add tag
Choose:
course-customer
Systeme.io Automation Tutorial
Step 4: Add Another Action
Add another action:
Enroll in course
Select the appropriate course.
Step 5: Send a Welcome Email
Add another action: Systeme.io Automation Tutorial
Send email
Create a short welcome email explaining what the customer should do next.
Step 6: Add a Delay
You may not want to send another email immediately.
Add a delay.
For example:
Wait 2 days
Then send another email.
Systeme.io supports delays in workflows, including time-based delays and exact-date delays.
Understanding Delays in Systeme.io Workflows
Delays are important because automation should not always happen immediately.
Consider a course onboarding sequence.
Sending five emails within five minutes would create a poor customer experience.
Instead:
Purchase → Welcome email → Wait 1 day → Getting started email → Wait 3 days → Progress email
Delays make your automation feel more natural. Systeme.io Automation Tutorial
One important point from Systeme.io’s documentation is that changing the duration of a delay affects new contacts entering that delay step; contacts already waiting retain the original delay schedule.
Therefore, test your timing carefully before launching a large campaign.
How to Use Decisions in Systeme.io Workflows
Decisions make workflows more intelligent.
Instead of sending every contact through the exact same sequence, you can create different paths.
For example:
Lead enters workflow
↓
Send offer email
↓
Wait 2 days
↓
Did the contact click?
YES
Send advanced product information.
NO
Send another educational email. Systeme.io Automation Tutorial
Systeme.io workflows support decisions based on filters and conditions.
This is particularly useful for:
- Lead nurturing
- Customer onboarding
- Course engagement
- Sales follow-up
- Segmentation
- Re-engagement
- Systeme.io Automation Tutorial
Example: Systeme.io Lead Nurturing Automation
Let’s create a practical lead-generation automation.
Imagine you are offering a free digital marketing checklist.
Step 1: Visitor submits the opt-in form
Trigger:
Funnel form subscribed
Step 2: Add a tag
Action:
Add digital-marketing-lead
Step 3: Send welcome email
Action:
Send email
Email content:
“Here is your free digital marketing checklist.”
Step 4: Wait
Delay:
2 days
Step 5: Send educational email
Explain a common marketing problem and provide a useful solution. Systeme.io Automation Tutorial
Step 6: Wait
Delay:
3 days
Step 7: Send case study
Show how your strategy or service can solve a real problem.
Step 8: Add a decision
Check whether the contact has demonstrated the desired behavior.
Step 9: Create different paths
High-intent contacts can receive a sales-oriented message. Systeme.io Automation Tutorial
Less-engaged contacts can receive additional educational content.
This is a simple but effective lead-nurturing system.
Example: Systeme.io Product Purchase Automation
Let’s say you sell an ebook.
Your desired automation might be:
New sale → Add customer tag → Send delivery email
You can also add other actions depending on your business model.
Systeme.io documentation provides an example where an ebook purchase triggers a New Sale automation, allowing an email to be sent with the digital product attached.
A practical sequence could be:
Purchase
↓
Add ebook-customer tag
↓
Send delivery email
↓
Wait 2 days
↓
Send “How to use the ebook” email
↓
Wait 5 days
↓
Send related offer
This can turn a one-time transaction into a longer customer relationship.
Systeme.io Automation for Course Creators
If you sell online courses, automation can save a significant amount of administrative work. Systeme.io Automation Tutorial
You can create automations around course activity.
Systeme.io supports triggers associated with course enrollment and course, module, and lecture completion.
For example:
When a student enrolls
Send:
“Welcome to the course.”
When a module is completed
Send:
“Congratulations on completing Module 1.”
When the course is completed
Send:
“Congratulations! You completed the course.” Systeme.io Automation Tutorial
You can also use completion events to trigger other actions depending on your workflow design.
This can create a more engaging learning experience.
Systeme.io Automation for Email Link Clicks
Another useful automation is tracking engagement with links in your emails.
For example, suppose you send an email containing two links: Systeme.io Automation Tutorial
Learn More
and
Book a Call
You can use email-link activity as part of your automation strategy.
Systeme.io currently supports an Email link clicked trigger. For simple automation rules, you can select the email and specific link; workflows can use email-click conditions, although the current workflow implementation has limitations around selecting a specific link directly. Systeme.io Automation Tutorial
This can help you identify engaged subscribers.
For example:
Contact clicks product link → Add interested tag → Send relevant follow-up
Systeme.io Automation for Webinars
If you’re using a webinar funnel, automation can help organize communication around registration.
A possible sequence is:
Webinar registration
↓
Add webinar-lead tag
↓
Send confirmation email
↓
Wait
↓
Send reminder
↓
Webinar
↓
Send follow-up
The exact automation structure will depend on your webinar setup and the triggers available in your account. Systeme.io Automation Tutorial
Systeme.io currently includes webinar registration as a workflow trigger.
Systeme.io Automation for Communities
If you’re using Systeme.io’s community functionality, automation can also be used for access management.
For example:
Purchase → Add tag → Grant community access
or:
Membership condition → Revoke community access
Systeme.io’s documentation explains that community access can be automated using both automation rules and workflows. Systeme.io Automation Tutorial
This can be particularly useful for paid memberships and course communities.
Systeme.io Automation with SMS
Email isn’t the only communication option. Systeme.io Automation Tutorial
Systeme.io workflows can also include SMS actions.
According to Systeme.io’s documentation, SMS can be configured as a workflow action, and SMS functionality uses a connected Twilio account.
A simple example could be:
Appointment-related trigger → Send SMS reminder
However, SMS automation should be used responsibly and in accordance with applicable consent and messaging requirements.
Systeme.io Automation with Google Sheets
If you need to maintain an external record of contacts or events, workflows can also connect with Google Sheets. Systeme.io Automation Tutorial
Systeme.io currently supports an Add a new row to a Google Sheet action in workflows.
For example:
Lead submits form
↓
Workflow
↓
Add contact information to Google Sheet
This can be useful for:
- Lead tracking
- Sales teams
- Appointment management
- Reporting
- Internal records
The Google Sheets action is currently available in workflows rather than simple automation rules. Systeme.io Automation Tutorial
Systeme.io Automation with Webhooks
Advanced users may want to send automation data to another system.
Systeme.io supports webhook actions that send trigger-related data through an HTTP request in JSON format.
This can be useful when connecting Systeme.io with another application or custom system.
For example:
New lead → Workflow → Webhook → External application
Webhooks are more technical than normal automation rules, so beginners should first become comfortable with basic triggers, actions, tags, and workflows.
How to Activate a Systeme.io Workflow
Creating a workflow isn’t enough.
You also need to activate it.
According to Systeme.io’s workflow documentation, you can activate a workflow from the workflow list using the three-dot menu and selecting Activate.
This is an important step.
Before activation, carefully check:
- Trigger
- Offer/page selection
- Tags
- Email content
- Delays
- Decisions
- Actions
- Course access
- External integrations
- Contact segmentation
- Systeme.io Automation Tutorial
Then activate the workflow.
How to Test Your Systeme.io Automation
Never assume your automation works simply because you created it.
Always test it.
Test 1: Use a Test Email
Submit your funnel using an email address you control.
Test 2: Check the Contact
Open the contact record and verify whether the correct tag or action occurred.
Test 3: Check Email Delivery
Confirm that the expected email was sent.
Test 4: Check Delays
Make sure the timing is correct.
Test 5: Test Different Paths
If your workflow contains a decision, test both:
YES path
and
NO path
Test 6: Test the Purchase Flow
If the automation starts after a purchase, test the complete customer journey carefully. Systeme.io Automation Tutorial
Testing is especially important for workflows involving payments, course access, or multiple email sequences.
Common Systeme.io Automation Mistakes
Mistake 1: Forgetting the Trigger
A workflow without a properly configured trigger won’t behave as intended.
Systeme.io notes that although steps can technically be added before a trigger, the workflow will not run without a trigger.
Mistake 2: Using Too Many Tags
Tags are useful, but creating dozens of unnecessary tags can make your system confusing.
Use a consistent naming strategy.
Mistake 3: Sending Too Many Emails
Automation should improve communication, not overwhelm subscribers.
Mistake 4: Not Testing
Always test before sending real customers through the workflow.
Mistake 5: Creating Complicated Workflows Too Early
Start simple.
Build:
Trigger → Action
Then add:
Delay → Decision → Additional actions
as your requirements grow.
Mistake 6: Forgetting Workflow Activation
A completed workflow isn’t necessarily an active workflow.
Check its activation status before launching your campaign.
Mistake 7: Ignoring Existing Contacts
Pay attention to when the automation becomes active.
Systeme.io notes that actions triggered by workflow events generally execute when the triggering event occurs after the workflow is activated.
Best Practices for Systeme.io Automation
1. Give Every Automation a Clear Name
Instead of:
Workflow 1
use:
Lead Magnet - Digital Marketing - Welcome Sequence
This makes your account easier to manage.
2. Use a Consistent Tag Structure
For example:
lead-ebook
lead-webinar
customer-course
customer-ebook
Consistency matters when your automation system grows.
3. Keep Your Workflows Organized
Avoid unnecessary branches.
Every decision should have a purpose.
4. Write Helpful Emails
Don’t automate generic messages just because you can.
Every automated email should provide value.
5. Use Delays Strategically
Think about how much time your customer needs between messages.
6. Review Your Automations Regularly
Businesses change.
Offers change.
Funnels change.
Email sequences change.
Review your automations periodically to make sure they still match your business process.
Pros and Cons of Systeme.io Automation
Pros
1. Saves Time
Automation handles repetitive marketing tasks without requiring manual intervention every time.
2. Supports Complex Customer Journeys
Workflows can combine triggers, actions, decisions, and delays.
3. Useful for Beginners
You can start with simple trigger-and-action rules before moving into advanced workflows.
4. Built-In Email Automation
Systeme.io includes email campaigns and automated email functionality, reducing the need to immediately rely on a separate autoresponder.
5. Useful for Course Businesses
Course enrollment and completion events can be connected to automations.
6. Multiple Automation Options
You can automate based on forms, sales, tags, email activity, courses, webinars, page visits, and other events.
7. Supports External Connections
Depending on your requirements, you can use tools such as Google Sheets, webhooks, and Twilio-powered SMS functionality.
Cons
1. Complex Workflows Can Become Difficult to Manage
As you add more branches, delays, and conditions, your workflow can become harder to understand.
2. Requires Proper Planning
Automation doesn’t replace strategy.
You still need to decide:
- Who receives the message?
- What should happen?
- When should it happen?
- What happens if the customer purchases?
- What happens if they don’t engage?
- Systeme.io Automation Tutorial
3. Testing Is Essential
A mistake in automation can result in the wrong email being sent or the wrong action being performed.
4. Some Advanced Integrations Require Extra Setup
Webhook, SMS, and external integrations may require additional configuration or technical knowledge.
5. Automation History Is Not Permanent
Systeme.io states that automation-rule and workflow execution history is retained for approximately one month before being removed as part of system cleanup.
A Simple Systeme.io Automation Strategy for Beginners
If you’re completely new to automation, don’t start with a huge workflow.
Start with this:
Step 1: Create a Lead Magnet
Example:
Free Digital Marketing Checklist
Step 2: Create an Opt-In Funnel
Collect the visitor’s email address.
Step 3: Create a Tag
Example:
digital-marketing-lead
Step 4: Create an Automation Rule
Trigger:
Funnel form subscribed
Action:
Add tag
Step 5: Send a Welcome Email
Give the subscriber the promised resource.
Step 6: Create an Email Campaign
Add educational emails.
Step 7: Subscribe the Contact
Use automation to subscribe the new lead to the campaign.
Step 8: Monitor Results
Review whether contacts are entering the automation and whether the intended actions are occurring.
Once this basic system works, you can expand it into a workflow.
Advanced Systeme.io Automation Funnel
Once you understand the basics, you can build a more sophisticated funnel.
For example:
Traffic
↓
Landing Page
↓
Lead Magnet
↓
Tag: New Lead
↓
Welcome Email
↓
Educational Sequence
↓
Engagement Check
↓
Interested?
YES
↓
Product Offer
↓
Purchase
↓
Customer Tag
↓
Course Enrollment
↓
Customer Onboarding
NO
↓
Additional Education
↓
Re-engagement
This type of automation can help turn a basic funnel into a complete customer journey.
How to Make Your Systeme.io Automation More Effective
The goal of automation isn’t to automate everything.
The goal is to automate the right things.
Start by identifying repetitive processes in your business.
Ask:
- What task do I perform repeatedly?
- What event starts that task?
- Can Systeme.io detect that event?
- What action should happen automatically?
- Should there be a delay?
- Should different customers receive different actions?
- What should happen if the customer buys?
- What should happen if they don’t engage?
- How will I test the automation?
- How will I know whether it is working?
These questions help you design automation around your business process instead of randomly adding actions.
Final Thoughts
Systeme.io automation can become one of the most useful parts of your marketing system once you understand how triggers, actions, tags, delays, decisions, and workflows work together.
For beginners, the best approach is to start small.
Create a simple automation:
Trigger → Action
Once you’re comfortable, introduce:
Trigger → Action → Delay → Action
Then move toward more advanced structures:
Trigger → Action → Delay → Decision → Multiple Paths → Follow-Up
Systeme.io’s current automation tools support a broad range of use cases, including lead generation, email campaigns, sales, courses, communities, SMS, Google Sheets, webhooks, and customer follow-up.
The most important lesson is that automation should support a clear marketing strategy. A complicated workflow isn’t necessarily better than a simple one.
Build the customer journey first.
Then automate it.
Test everything.
Monitor the results.
And improve the workflow as your business grows.
Frequently Asked Questions About Systeme.io Automation
1. What is Systeme.io automation?
Systeme.io automation allows you to automatically perform actions when specific events occur. For example, a form submission can trigger a tag, email, campaign subscription, or another action.
2. What is the difference between Systeme.io automation rules and workflows?
Automation rules are generally suited to simpler trigger-and-action processes. Workflows are designed for more advanced sequences that can include triggers, actions, delays, decisions, and multiple paths.
3. Can Systeme.io send automated emails?
Yes. Systeme.io provides email campaigns and automated email actions that can be connected to triggers and workflows.
4. Can I automate a welcome email?
Yes. You can create an automation based on a form subscription and use a send-email action to deliver a welcome message.
5. Can I automate customer onboarding?
Yes. You can build a workflow that starts after a purchase and then performs actions such as adding a tag, enrolling the customer in a course, sending emails, and adding delays.
6. Can Systeme.io automate course completion emails?
Yes. Systeme.io provides course, module, and lecture completion triggers that can be used with automation rules and workflows.
7. Can I use tags in Systeme.io automation?
Yes. Tags are useful for segmenting contacts and triggering actions. Systeme.io supports tag-based triggers and tag-related actions.
8. Can I create an automated sales funnel with Systeme.io?
Yes. You can connect funnel activity with automation rules and workflows to automate lead nurturing, email communication, customer tagging, product delivery, and other processes.
9. Can Systeme.io automation send SMS?
Yes. Systeme.io workflows can use a Send SMS action. SMS functionality requires the appropriate configuration and a connected Twilio account.
10. Can Systeme.io connect automation with Google Sheets?
Yes. Systeme.io currently provides an action for adding a new row to a Google Sheet within workflows.
11. Can I use webhooks with Systeme.io automation?
Yes. Systeme.io supports webhook actions that can send trigger-related data through HTTP requests in JSON format.
12. Why isn’t my Systeme.io automation working?
Check whether the correct trigger is selected, the correct page or offer is connected, the required tags and actions are configured, and the workflow is activated. Also test the automation with a controlled contact before launching it to your entire audience.
13. Is Systeme.io automation good for beginners?
Yes. Beginners can start with simple automation rules and gradually learn workflows. Starting with a basic trigger-and-action setup is usually easier than immediately building a complex workflow.
14. How many steps should a Systeme.io workflow have?
There is no universal ideal number. Build only the steps necessary to achieve your goal. A short workflow that works reliably is better than a complicated workflow that is difficult to test and maintain.
15. What is the best way to learn Systeme.io automation?
Start with one practical project, such as a lead-magnet welcome sequence. Learn triggers, actions, tags, delays, and decisions one at a time. Once the basic workflow works, gradually introduce more advanced automation.
Quick Systeme.io Automation Checklist
Before activating your automation, check the following:
- Define the goal of the automation.
- Identify the correct trigger.
- Select the correct funnel, page, offer, or course.
- Create the required tags.
- Configure the actions.
- Write and proofread automated emails.
- Add appropriate delays.
- Configure decisions if necessary.
- Check all workflow paths.
- Test with a real test contact.
- Confirm the expected email or action occurs.
- Activate the workflow.
- Monitor the automation after launch.
- Review and improve the workflow regularly.
Bottom line: Systeme.io automation is most effective when you combine a clear customer journey with simple, well-tested automation. Start with one process, make it reliable, and then expand your system as your business grows.
