
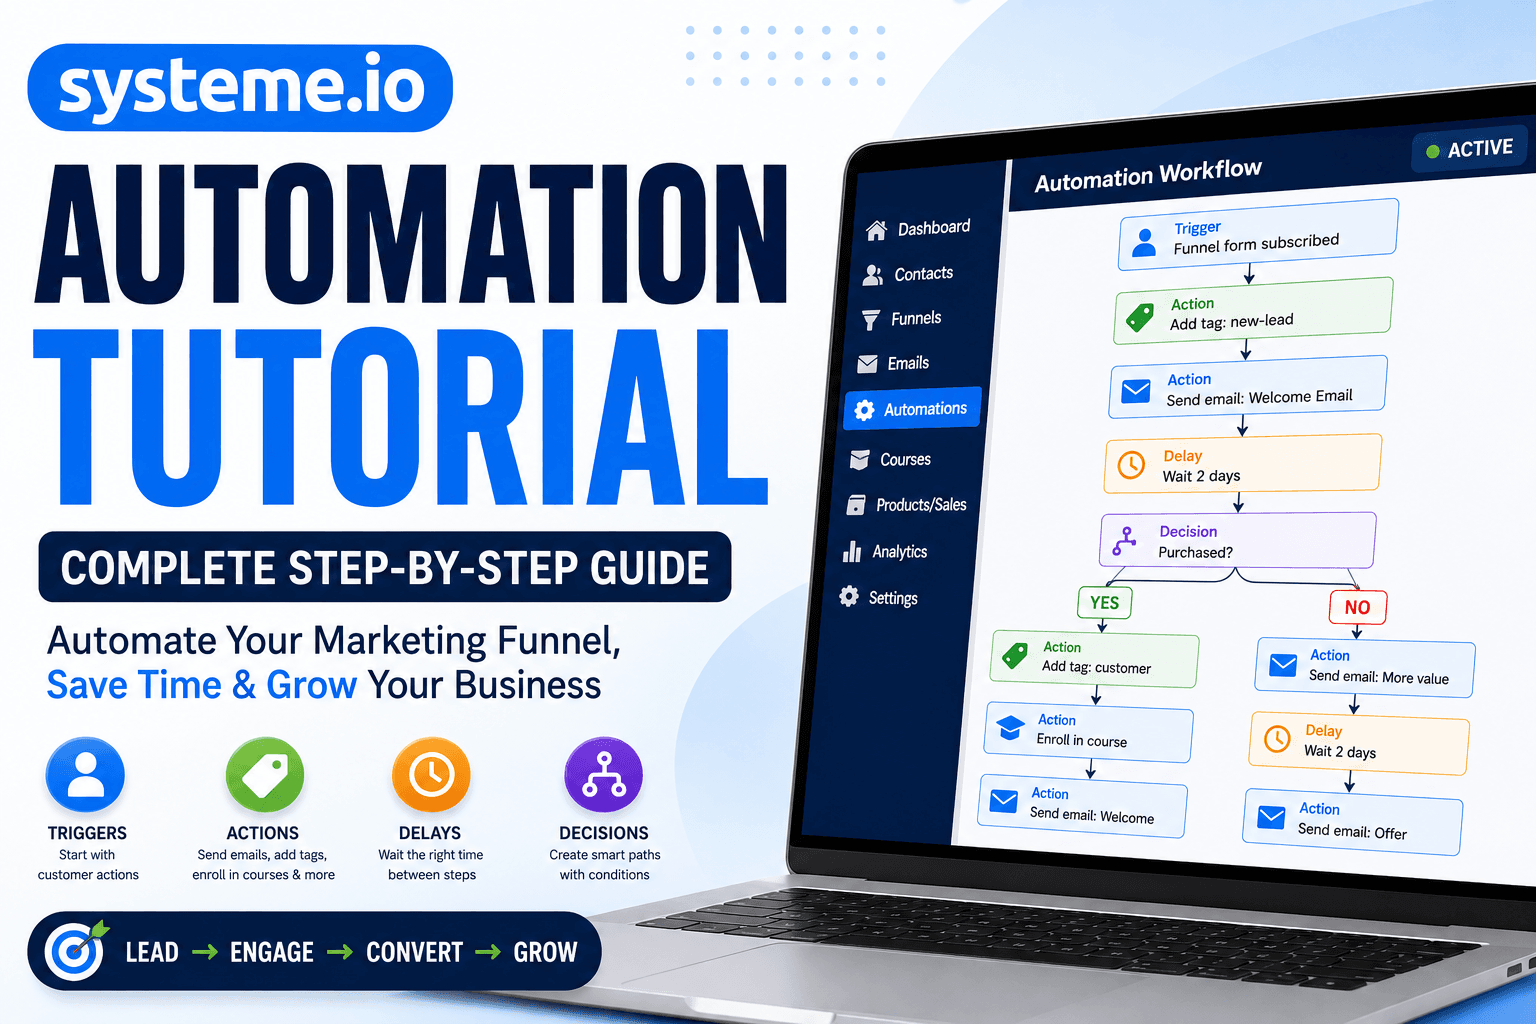

Systeme.io Automation Tutorial: Complete Step-by-Step Guide to Automating Your Marketing Funnel
Introduction
Running an online business manually can quickly become overwhelming.
You may need to collect leads, send welcome emails, follow up with prospects, promote products, deliver courses, segment customers, recover abandoned purchases, and keep existing customers engaged. If you try to perform all of these tasks manually, you can easily spend hours every week on repetitive work.
This is where Systeme.io automation becomes useful.
With Systeme.io, you can create automated rules and visual workflows that respond to actions taken by your contacts. For example, when someone submits an opt-in form, you can automatically add a tag, send an email, subscribe the person to an email campaign, or move them into another stage of your funnel.
Systeme.io’s current workflow system uses triggers, actions, decisions, and delays to build automated processes. Its workflow builder supports triggers such as form subscriptions, purchases, tags, email opens, link clicks, course enrollment, course completion, meetings, page visits, and other events.
In this Systeme.io automation tutorial, you will learn how automation works, how to create your first automation, how to use tags and email campaigns, how to build a complete lead-nurturing workflow, and how to avoid common automation mistakes.
Whether you are a beginner, affiliate marketer, coach, course creator, freelancer, consultant, or small business owner, this guide will help you understand how to automate your marketing funnel more efficiently.
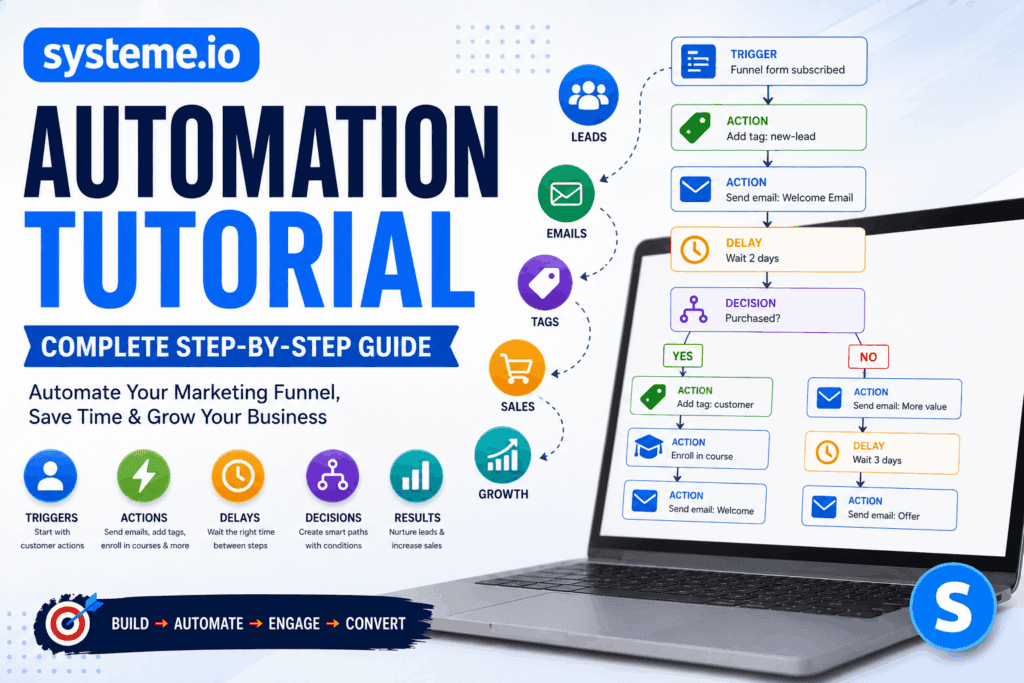
What Is Systeme.io Automation?
Systeme.io automation is a feature that allows you to automatically perform tasks when a specific event occurs.
Instead of manually checking your contact list and deciding what to do next, you define the process once. Systeme.io Automation Tutorial
For example:
Visitor → Opt-in → Tag → Welcome Email → Follow-Up → Product Offer → Purchase → Customer Email
Once the automation is active, Systeme.io can execute these steps based on the conditions you configure.
At its simplest, automation follows this model:
Trigger → Action → Delay → Action → Decision → Next Action
A trigger starts the automation.
An action tells Systeme.io what to do.
A delay determines when the next step should happen.
A decision allows the workflow to branch based on contact information or behavior.
Systeme.io’s official documentation describes workflows using triggers, actions, decisions, and delays. Systeme.io Automation Tutorial
This makes automation particularly useful for sales funnels because different visitors can receive different messages depending on what they do.
Why Should You Use Systeme.io Automation?
Before learning the technical setup, it is important to understand why automation matters. Systeme.io Automation Tutorial
1. Save Time
Automation can eliminate repetitive tasks.
Instead of manually sending a welcome email every time someone joins your list, you can configure the process once.
The system can handle the follow-up automatically.
2. Respond Faster: Systeme.io Automation Tutorial
A new lead is usually most engaged immediately after signing up.
An automated welcome email can be sent without waiting for you to manually process the new subscriber.
3. Build Consistent Follow-Ups
One of the biggest advantages of automation is consistency.
Every subscriber can receive the same carefully planned sequence without you remembering to send every message.
4. Segment Your Audience
Tags can help organize contacts according to their source, interests, actions, or customer status.
Systeme.io’s current tagging system can be used to classify contacts and support targeted communication.
5. Improve Customer Experience
Automation isn’t only about selling.
You can also automate:
- Welcome messages
- Course enrollment
- Customer onboarding
- Product delivery
- Appointment follow-ups
- Educational emails
- Re-engagement campaigns
- Post-purchase communication
- Systeme.io Automation Tutorial
6. Reduce Human Error
Manual marketing creates opportunities for mistakes.
You may forget to send an email, follow up with a lead, remove a customer from a promotional campaign, or deliver access to a course.
Automation can handle these repetitive processes according to the rules you establish.
Systeme.io Automation Rules vs. Workflows
One important concept beginners should understand is the difference between Automation Rules and Workflows.
Automation Rules
Automation rules are useful for relatively straightforward trigger-and-action processes.
For example:
Trigger: Someone submits an opt-in form.
Action: Add the tag “New Lead.”
Or:
Trigger: Someone purchases a product.
Action: Subscribe them to a customer email campaign.
Systeme.io’s automation rules interface allows you to select triggers and actions for these types of processes. Systeme.io Automation Tutorial
Workflows
Workflows are better when your automation requires multiple steps and branching logic.
For example:
New Lead
↓
Add Lead Tag
↓
Send Welcome Email
↓
Wait 2 Days
↓
Send Educational Email
↓
Decision: Did They Purchase?
↓
Yes → Customer Onboarding
No → Continue Nurturing
This type of visual structure makes complex automation easier to understand and manage.
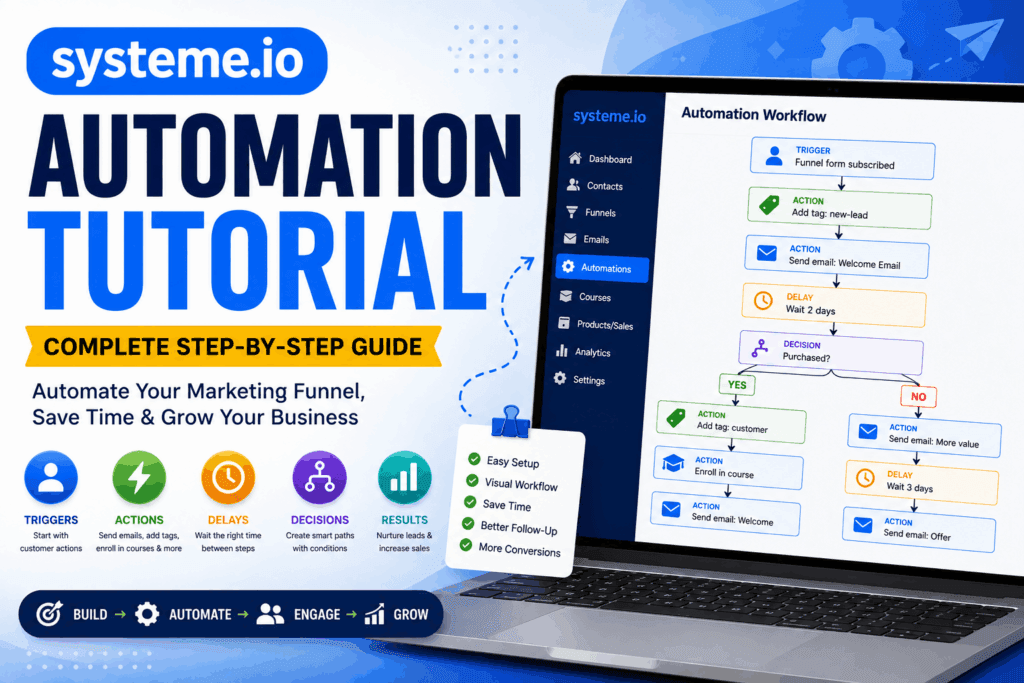
Key Components of Systeme.io Automation
Before creating your first workflow, learn these four components.
1. Trigger
A trigger is the event that starts the automation.
Examples include:
- Funnel form subscribed
- Website form subscribed
- New sale
- Tag added
- Tag removed
- Email opened
- Email link clicked
- Page visited
- Meeting scheduled
- Course enrollment
- Course completed
- Webinar registration
- Subscription payment failed
- Systeme.io Automation Tutorial
Systeme.io currently supports a broad range of workflow triggers.
Think of the trigger as:
“When this happens…”
2. Action
An action is what Systeme.io does after the trigger occurs.
Depending on your workflow, actions can include:
- Send an email
- Add a tag
- Remove a tag
- Subscribe to a campaign
- Unsubscribe from a campaign
- Enroll someone in a course
- Revoke course access
- Send a webhook
- Send SMS
- Grant community access
- Move a contact to a pipeline stage
- Add a row to Google Sheets
These capabilities are documented in Systeme.io’s current workflow help documentation.
Think of an action as:
“…do this.”
3. Delay
A delay tells the system to wait before continuing to the next step.
For example:
Day 0: Welcome email
Day 2: Educational email
Day 4: Case study
Day 6: Product introduction
Day 8: Offer email
Delays help prevent your subscribers from receiving too many messages at once. Systeme.io Automation Tutorial
4. Decision
A decision allows your workflow to follow different paths.
For example:
Did the contact purchase the product?
If yes:
→ Remove them from the promotional sequence.
→ Add customer tag.
→ Start onboarding.
If no:
→ Continue the lead-nurturing sequence.
This is where workflows become significantly more powerful than simple automation rules.
How to Create Your First Systeme.io Automation
Now let’s build a basic automation step by step. Systeme.io Automation Tutorial
For this example, imagine that you have created a lead magnet called:
“10 Digital Marketing Strategies for Beginners.”
Your goal is to automatically send the lead magnet and begin nurturing the subscriber.
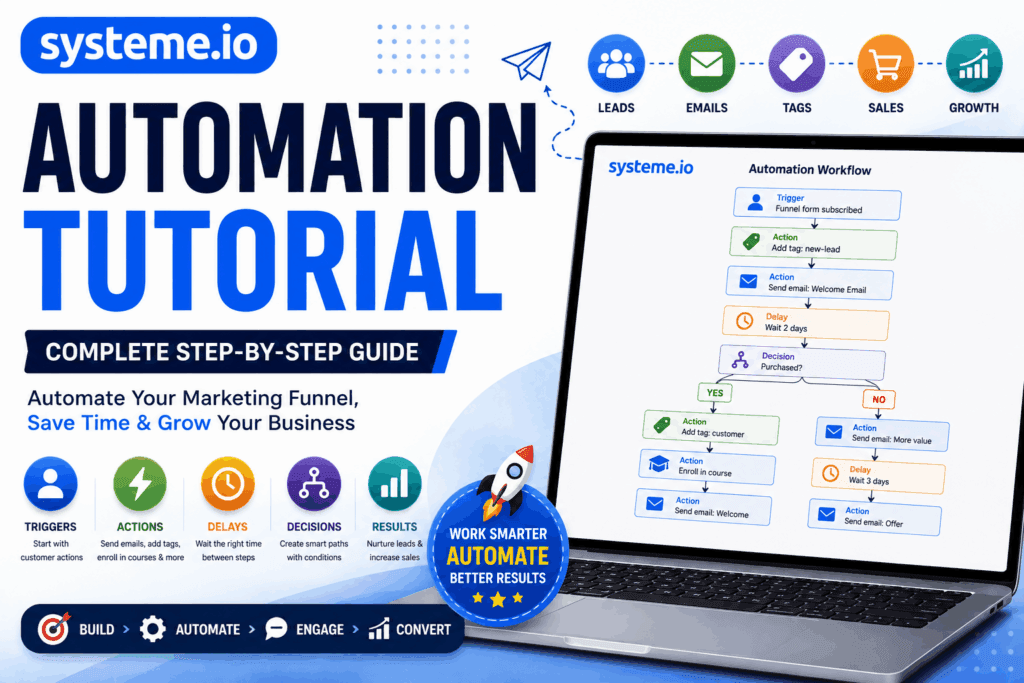
Step 1: Create Your Lead Capture Funnel
First, create a funnel containing an opt-in page. Systeme.io Automation Tutorial
Your page should contain:
- A strong headline
- Short description
- Benefits
- Email form
- Call-to-action button
- Privacy information where appropriate
For example:
Headline:
“Download the Free 10-Step Digital Marketing Guide”
CTA:
“Get My Free Guide”
When a visitor submits the form, they become a contact in your system.
Systeme.io also allows automation to be configured directly from certain form elements and website pages.
Step 2: Create a Tag
Tags are extremely important for automation.
Create a tag such as:
Lead-Digital-Marketing
You could also use tags such as:
- Lead-New
- Lead-Ebook
- Customer
- Course-Student
- Webinar-Registered
- Interested-SEO
- Interested-Facebook-Ads
- Purchased-Course
The goal is to use clear and consistent naming conventions.
Systeme.io allows tags to be created from the CRM area and can also create tags directly while configuring automation rules. Systeme.io Automation Tutorial
Step 3: Create the Automation Rule
Go to:
Automations → Rules
Then create a new rule.
Choose your trigger.
For this example, select the form subscription trigger associated with your opt-in page.
The logic is:
When someone submits my opt-in form → start automation.
Systeme.io’s documentation shows that funnel form subscriptions can be used as automation triggers.
Step 4: Add the Lead Tag
Next, add an action.
Choose:
Add Tag
Select:
Lead-Digital-Marketing
Now every new subscriber from that form can automatically receive the appropriate tag.
This is useful because you can later use the tag for segmentation.
Step 5: Send a Welcome Email
Add another action:
Send Email
Create your welcome email.
A simple email could look like this:
Subject: Your Free Digital Marketing Guide Is Here
Email:
Hi,
Thanks for requesting the Digital Marketing Guide.
You can access your guide using the button below.
Inside the guide, you’ll discover practical strategies that can help you understand the fundamentals of online marketing.
Enjoy the guide!
Best,
Your Name
The purpose of this first email is not necessarily to make a sale.
Its primary goal is to deliver what the subscriber requested and begin building trust.
Step 6: Add an Email Campaign
For a longer follow-up sequence, you can use an email campaign.
For example:
Email 1 — Immediately
Deliver the lead magnet.
Email 2 — Day 2
Teach one useful strategy.
Email 3 — Day 4
Explain a common mistake.
Email 4 — Day 6
Share a case study.
Email 5 — Day 8
Introduce your product or service.
Email 6 — Day 10
Answer common objections.
Email 7 — Day 12
Present your offer.
This turns a simple opt-in into a complete lead-nurturing system.
Systeme.io supports automatically subscribing contacts to campaigns through automation.
Building a Complete Systeme.io Automation Workflow
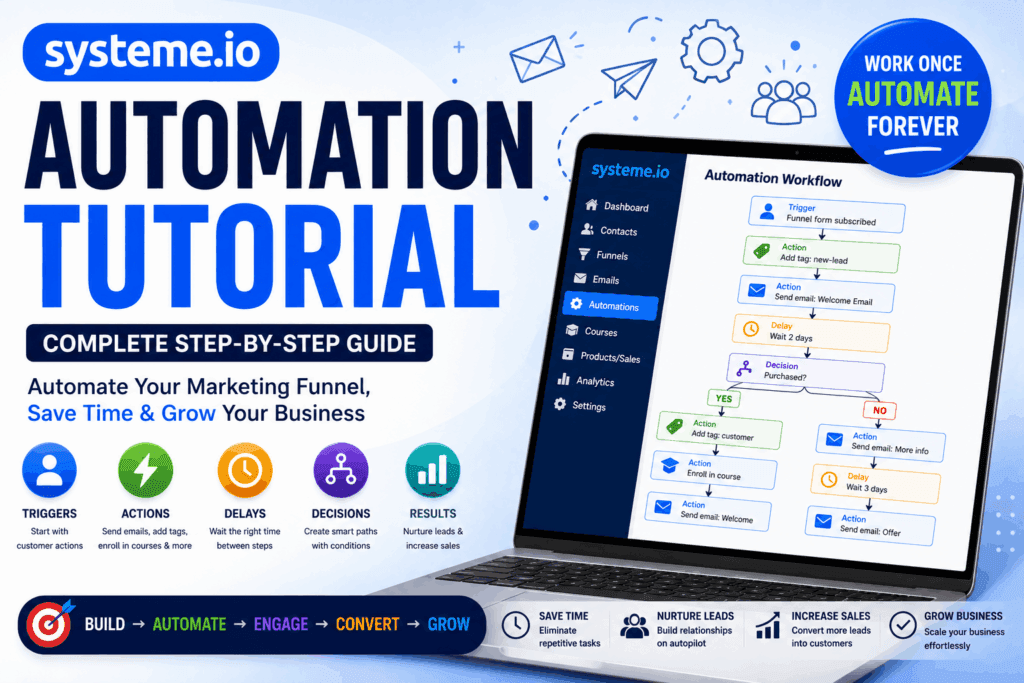
Now let’s create a more advanced example.
Imagine you sell an online course called:
Digital Marketing Mastery
Your automation can look like this:
New Lead
↓
Add Lead Tag
↓
Send Welcome Email
↓
Wait 2 Days
↓
Send Educational Email
↓
Wait 2 Days
↓
Send Case Study
↓
Decision: Has Customer Purchased?
If YES:
→ Add Customer Tag
→ Remove from Lead Campaign
→ Enroll in Course
→ Send Welcome Email
If NO:
→ Continue Nurturing
→ Send Offer Email
→ Wait 3 Days
→ Send FAQ Email
→ Final Reminder
This type of workflow allows you to create a more personalized customer journey. Systeme.io Automation Tutorial
How to Create a Systeme.io Workflow
Go to:
Automations → Workflows
Then select:
Create
Give your workflow a descriptive name.
For example:
Lead Magnet → Course Sales Funnel
Systeme.io’s current workflow setup begins from the Automations area and allows you to create a workflow before adding triggers and subsequent steps.
Step 1: Add the Trigger
Select:
Funnel Form Subscribed
Then select the appropriate funnel form.
This means:
Whenever someone submits this form, start the workflow.
Remember that a workflow needs an appropriate trigger to actually run. Systeme.io notes that steps can technically be added without a trigger, but the workflow will not execute until a trigger is configured. Systeme.io Automation Tutorial
Step 2: Add a Tag
Add the action:
Add Tag
Select:
New-Lead
This gives you a simple way to identify new prospects.
Step 3: Send Your First Email
Add:
Send Email
Create a short welcome message.
Don’t make the first email unnecessarily complicated.
Focus on:
- Delivering the promised resource
- Setting expectations
- Establishing credibility
- Encouraging the next small action
- Systeme.io Automation Tutorial
Step 4: Add a Delay
Add a delay of two days.
This means the next workflow action will occur after the configured waiting period.
Delays are especially useful for email sequences because they allow your subscribers time to consume your content.
One important point: changing the duration of a delay affects contacts entering that step after the change; contacts already waiting there retain their original delay.
Step 5: Add an Educational Email
After the delay, send an educational email.
For example:
Subject: The Biggest Mistake New Marketers Make
Explain one important problem and provide a useful solution.
Avoid turning every email into a sales pitch.
Your goal is to demonstrate expertise and build trust.
Step 6: Add Another Delay
Wait another two days. Systeme.io Automation Tutorial
Then send your next email.
This email could contain:
- A case study
- A tutorial
- A success story
- A checklist
- A useful strategy
- Systeme.io Automation Tutorial
Step 7: Add a Decision
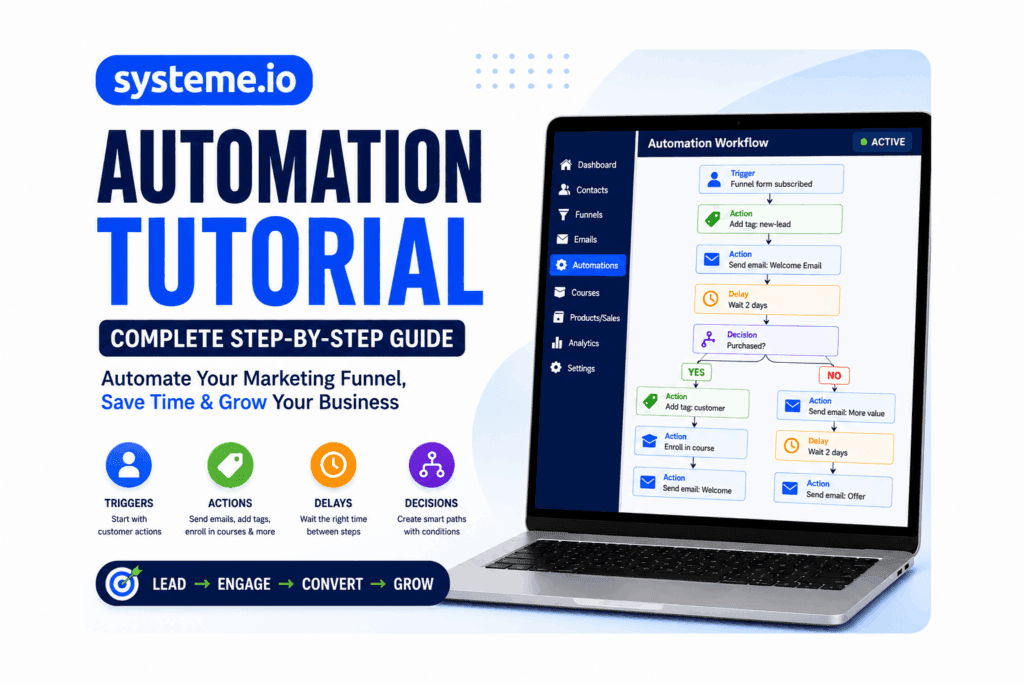
Now add a decision.
For example:
Does the contact have the Customer tag?
If the answer is yes, send the contact down the customer path.
If the answer is no, continue the prospect path. Systeme.io Automation Tutorial
This prevents customers from continuing to receive messages designed for people who have not purchased.
Why Tags Are So Important
Tags are one of the foundations of effective Systeme.io automation.
Without proper tagging, your database can become difficult to manage.
Consider these examples:
Lead
Customer
Course Student
Webinar Registrant
High Intent
Purchased Product A
Purchased Product B
You can use these tags to create targeted automation paths. Systeme.io Automation Tutorial
For example:
Purchased Product A
→ Remove from Product A sales sequence
→ Add Customer tag
→ Start onboarding
→ Recommend Product B later
This creates a more relevant customer experience.
Systeme.io’s tag dashboard also provides statistics related to contacts receiving and losing tags and associated sales data.
Systeme.io Email Automation Tutorial
Email automation is one of the most common reasons marketers use automation. Systeme.io Automation Tutorial
A simple email automation funnel could look like this:
Opt-In
↓
Welcome Email
↓
Educational Email
↓
Problem Email
↓
Solution Email
↓
Case Study
↓
Offer
↓
Reminder
You don’t need to manually send these messages every time a new subscriber joins.
Once your automation is properly configured, the system can handle the sequence according to your rules. Systeme.io Automation Tutorial
How to Automate Based on Email Clicks: Systeme.io Automation Tutorial
You can also use email behavior to personalize your automation.
For example:
Suppose you send an email containing three links:
- SEO
- Facebook Ads
- Email Marketing
If someone clicks your SEO link, you can use that behavior as a signal that the topic interests them.
Systeme.io supports email-link-click triggers for automation rules and workflows.
You could then:
Email Link Clicked → Add SEO Interest Tag → Send SEO Content
This can make your marketing more targeted.
Systeme.io Automation for Sales Funnels
Automation becomes especially powerful when connected to your sales funnel.
A basic sales funnel automation might look like:
Landing Page
↓
Opt-In
↓
Lead Tag
↓
Email Sequence
↓
Sales Page
↓
Purchase
↓
Customer Tag
↓
Course Enrollment
↓
Onboarding
This allows you to automate much of the customer journey. Systeme.io Automation Tutorial
Systeme.io Purchase Automation
You can create an automation that begins when someone makes a purchase.
For example:
Trigger: New Sale
Action: Add Customer Tag
Action: Enroll in Course
Action: Send Welcome Email
Action: Remove from Sales Campaign
Systeme.io Automation Tutorial
This ensures that your new customer moves from the prospect journey into the customer journey.
Systeme.io supports a “New sale” trigger and actions related to course enrollment and campaign management.
Automating Course Enrollment
If you sell online courses, automation can save significant time.
For example:
Customer Purchases Course
↓
Enroll Customer
↓
Send Login/Welcome Information
↓
Add Student Tag
↓
Start Onboarding
↓
Send Lesson Reminder
↓
Course Completion
↓
Request Feedback
Systeme.io supports triggers for course enrollment, module completion, lecture completion, and course completion. Systeme.io Automation Tutorial
This makes it possible to build automation around the student’s learning journey rather than only around sales.
Automating Abandoned Purchases
Abandoned purchases are another useful automation opportunity.
For example:
Potential Customer
↓
Visits Offer
↓
Begins Purchase Process
↓
Does Not Complete Purchase
↓
Follow-Up
The exact implementation depends on your funnel structure and the events available for your particular setup. Systeme.io Automation Tutorial
The goal is to remind interested prospects without aggressively contacting people who have no purchase intent.
A good abandoned-purchase sequence could be:
Email 1
“Did you have any questions?”
Email 2
“Here’s what you’ll get”
Email 3
“Answers to common questions”
Email 4
“Last reminder”
Keep the messaging helpful rather than overly aggressive.
Systeme.io Automation for Customer Onboarding
Automation shouldn’t stop after the sale. Systeme.io Automation Tutorial
Customer onboarding is one of the best areas to automate.
A simple onboarding workflow can be:
Purchase
↓
Customer Tag
↓
Course Enrollment
↓
Welcome Email
↓
Day 1: Getting Started
↓
Day 3: Complete Your First Lesson
↓
Day 7: Progress Check
↓
Day 14: Ask for Feedback
This helps customers understand what they should do next.
A well-designed onboarding system can also reduce confusion and support requests.
Systeme.io Re-Engagement Automation
Not every subscriber will remain active forever.
Some people stop opening emails. Systeme.io Automation Tutorial
Instead of immediately deleting them, consider creating a re-engagement sequence.
For example:
Inactive Contact
↓
Re-Engagement Email
↓
Wait
↓
Second Email
↓
Decision: Engaged?
Yes
→ Keep subscriber active.
No
→ Consider removing them from certain campaigns or adjusting your communication strategy.
The goal is to maintain a healthy and relevant audience rather than simply accumulating contacts. Systeme.io Automation Tutorial
Systeme.io Automation for Webinars
If you promote webinars, automation can simplify registration and follow-up.
Example:
Webinar Registration
↓
Add Webinar Tag
↓
Send Confirmation
↓
Reminder Email
↓
Webinar Day Reminder
↓
Post-Webinar Email
↓
Offer
↓
Decision: Purchased?
Yes
→ Customer onboarding
No
→ Additional follow-up
This creates a complete webinar marketing funnel without requiring manual intervention for every registrant.
Systeme.io Automation With Webhooks
More advanced users can connect automation to external systems using webhooks.
A webhook can send data to another service when a specified event occurs. Systeme.io Automation Tutorial
Systeme.io automatic tutorial documents webhook actions that can send trigger-related data as an HTTP request in JSON format.
This can be useful when you need to connect your funnel with another application or custom system.
For example:
Lead Created
↓
Systeme.io Webhook
↓
External Application
↓
Additional Processing
This is more advanced than standard email automation, but it can be valuable for businesses with custom technical requirements.
Systeme.io Automation With Google Sheets
Systeme.io workflows can also include an action to add a new row to Google Sheets.
For example:
New Lead
↓
Add Row to Google Sheet
↓
Sales Team Reviews Lead
This can be useful for businesses that want a simple operational record outside their CRM.
However, always make sure your data handling practices comply with applicable privacy requirements and your own business policies.
Systeme.io Automation Best Practices
Creating an automation is easy.
Creating a good automation requires planning. Systeme.io Automation Tutorial
Here are some best practices.
Systeme.io Automation Tutorial
1. Start Simple
Don’t build a 50-step workflow on your first attempt.
Start with:
Trigger → Email → Delay → Email
Test it.
Then expand it.
2. Map the Workflow Before Building
Write the logic on paper first.
For example:
New Lead
→ Add Tag
→ Welcome Email
→ Wait 2 Days
→ Educational Email
→ Wait 2 Days
→ Offer
→ Purchase?
→ Yes: Customer Path
→ No: Follow-Up
This makes the actual implementation much easier. Systeme.io Automation Tutorial
3. Use Clear Tag Names
Avoid confusing names such as:
tag1
newtag
customer2
Instead use:
Lead-Ebook
Customer-Course-A
Interest-SEO
Webinar-August-2026
Clear naming becomes extremely important as your business grows.
4. Always Think About Exit Conditions
One of the biggest automation mistakes is allowing customers to remain in a sales sequence after purchasing.
For example:
Systeme.io Automation Tutorial
Prospect
→ Sales Emails
→ Purchase
→ Still receives sales emails
That’s a poor customer experience.
Instead:
Purchase
→ Remove from prospect campaign
→ Add customer tag
→ Start customer onboarding
Systeme.io Automation Tutorial
Systeme.io’s own automation guidance emphasizes the importance of exit conditions so contacts don’t continue receiving irrelevant messages after purchasing.
5. Test Before Going Live
Create a test contact.
Then go through your funnel yourself.
Check:
- Did the trigger fire?
- Was the tag added?
- Did the email send?
- Did the delay work?
- Did the decision branch correctly?
- Was the customer removed from the correct campaign?
- Was course access granted?
- Did the webhook send correctly?
- Systeme.io Automation Tutorial
Never assume an automation works simply because it looks correct in the editor.
Common Systeme.io Automation Mistakes
Mistake 1: Forgetting the Trigger
A workflow without the correct trigger won’t perform the intended process.
Always verify your trigger before activating the workflow. Systeme.io Automation Tutorial Systeme.io Automation Tutorial
Mistake 2: Using Too Many Tags
Tags are useful, but creating hundreds of unnecessary tags can make your CRM difficult to understand.
Only create tags that serve a clear purpose.
Mistake 3: Sending Too Many Emails
Automation makes sending emails easy.
That doesn’t mean you should send emails constantly.
Focus on relevance and value. Systeme.io Automation Tutorial
Mistake 4: No Customer Exit Path
A customer shouldn’t continue receiving prospect-focused sales emails after purchasing.
Always think about what should happen after conversion.
Mistake 5: Not Testing
A small configuration mistake can affect an entire automation.
Test every important path. Systeme.io Automation Tutorial
Mistake 6: Making Every Email a Sales Pitch
Your automation should educate, help, and build trust.
A useful sequence might contain:
Education → Value → Story → Proof → Offer
rather than:
Buy → Buy → Buy → Buy
Pros and Cons of Systeme.io Automation
Pros
1. Easy Visual Workflow Builder
The visual workflow approach makes complex automation easier to understand.
2. Multiple Trigger Options
You can trigger automation based on actions such as form submissions, sales, tags, email activity, course activity, and more.
3. Useful for Sales Funnels
You can connect lead generation, email marketing, sales, and customer onboarding within the same ecosystem.
4. Tag-Based Segmentation
Tags allow you to organize contacts according to their behavior and status.
5. Course Automation
Course enrollment and completion events can be integrated into automation workflows.
6. Reduces Repetitive Work
Once properly configured, repetitive processes can happen automatically.
7. Suitable for Beginners
You don’t need advanced programming knowledge to build basic automation.
Cons
1. Advanced Workflows Can Become Complex
As you add multiple decisions, branches, tags, and delays, workflows can become difficult to manage.
2. Requires Careful Planning
Poorly designed automation can send the wrong message to the wrong person.
3. Testing Is Essential
You need to test your workflows before relying on them for important business processes.
4. Too Many Automations Can Become Difficult to Maintain
As your business grows, you may end up with many workflows and tags.
A good naming and documentation system becomes increasingly important.
5. Advanced Integrations May Require Technical Knowledge
Features such as webhooks and API-based integrations can require additional technical understanding. Systeme.io’s public API can interact with contacts, tags, subscriptions, newsletters, and automation-related processes, but implementing advanced integrations may require development knowledge.
A Simple Systeme.io Automation Blueprint
If you’re completely new to automation, start with this structure:
Lead Generation
Landing Page
↓
Form Submission
↓
Add Lead Tag
↓
Send Welcome Email
Lead Nurturing
↓
Wait 2 Days
↓
Educational Email
↓
Wait 2 Days
↓
Case Study
Sales
↓
Offer Email
↓
Purchase?
If Yes
Add Customer Tag
↓
Remove From Lead Campaign
↓
Enroll in Course
↓
Send Customer Welcome Email
If No
Continue Nurturing
↓
FAQ Email
↓
Final Offer
This simple structure can become the foundation of a much more sophisticated marketing funnel.
How to Measure Your Automation Performance
Creating automation is only the beginning.
You also need to evaluate whether it is working.
Important metrics include: Systeme.io Automation Tutorial
Email Open Rate
How many recipients opened your email?
Click-Through Rate
How many people clicked your links?
Conversion Rate
How many contacts took the desired action?
Sales
How much revenue was generated?
Unsubscribe Rate
How many subscribers left your list?
Workflow Drop-Off
Where are people stopping or failing to progress? Systeme.io Automation Tutorial
Instead of trying to improve everything at once, identify the weakest step and test one improvement.
For example:
If Email #3 has a much lower click rate than Email #2, review its:
- Subject line
- Message
- Call-to-action
- Offer
- Relevance
- Timing
- Systeme.io Automation Tutorial
Frequently Asked Questions About Systeme.io Automation
What is Systeme.io automation?
Systeme.io automation allows you to automatically execute tasks based on triggers and conditions. Depending on the setup, automation can send emails, add tags, subscribe contacts to campaigns, enroll students in courses, manage access, send webhooks, and perform other actions.
Is Systeme.io automation suitable for beginners?
Yes. Basic automation can be created without programming knowledge. Beginners can start with simple trigger-and-action rules before progressing to visual workflows with delays and decisions.
What is the difference between a Systeme.io automation rule and workflow?
Automation rules are generally suitable for straightforward trigger-and-action processes. Workflows are more appropriate when you need multiple steps, delays, decisions, and branching paths.
Can Systeme.io automatically send emails?
Yes. You can use automation rules, campaigns, and workflows to create automated email sequences.
Can I automate a welcome email?
Yes. A common setup is:
Form Submission → Send Welcome Email
You can also add a tag and subscribe the contact to a longer email campaign.
Can Systeme.io automatically tag leads?
Yes. Adding tags can be used as an automation action, and tags can also serve as triggers for additional automation.
Can I automate course enrollment?
Yes. Systeme.io supports course-related automation triggers and actions, including enrollment and course completion events.
Can I create different automation paths for customers and leads?
Yes. Decisions and filters can be used to branch workflows based on contact characteristics and behavior.
For example:
Customer → Onboarding
Non-Customer → Lead Nurturing
Can Systeme.io automation respond to email clicks?
Yes. Email-link-click triggers can be used to launch or modify automation based on subscriber behavior.
Can Systeme.io connect to Google Sheets?
Yes. Current workflow actions include adding a new row to a Google Sheet.
Can Systeme.io send webhooks?
Yes. Systeme.io provides a webhook action that can send trigger-related information as an HTTP request.
Should I use tags in every automation?
Not necessarily. Use tags when they provide meaningful segmentation or help control your automation logic. Avoid creating unnecessary tags.
How often should I review my automations?
Review important workflows regularly, especially after changing your funnel, products, offers, emails, or customer journey. Monitor performance and test critical paths periodically.
Final Thoughts
Read this also:
Systeme.io Affiliate Marketing: The Complete Guide to Building a Profitable Affiliate Business
Automation can transform the way you manage an online business.
Instead of manually performing the same tasks every day, you can build systems that respond automatically when your audience takes specific actions.
With Systeme.io automation, you can create everything from simple rules such as:
Form Submission → Welcome Email
to more advanced workflows such as:
Lead → Tag → Email Sequence → Decision → Purchase → Customer Onboarding
The key is not to create the most complicated automation possible.
The goal is to create an automation that is simple, logical, tested, and useful for your customer.
Start with one repetitive process.
Automate it.
Test it.
Measure the results.
Then improve it.
Once you understand triggers, actions, delays, decisions, tags, campaigns, and customer journeys, you can gradually build a complete automated marketing system around your business.
If you’re just getting started, your first project should be a simple lead-generation workflow:
Opt-In → Add Tag → Welcome Email → Delay → Educational Email → Offer
After that works reliably, you can expand into sales automation, course onboarding, webinar follow-up, customer segmentation, re-engagement, and advanced integrations.
That is the real power of Systeme.io automation: you build the process once, and the system can continue executing it whenever the defined conditions occur.
Quick Systeme.io Automation Checklist
- Create your funnel or website form
- Create clear tags
- Define your automation goal
- Choose the correct trigger
- Add the required actions
- Add appropriate delays
- Create decisions where necessary
- Build your email sequence
- Create a customer exit path
- Test the automation with a test contact
- Check every branch
- Monitor email performance
- Review and optimize the workflow regularly
Official Systeme.io workflow documentation: Systeme.io Help Center – How to Create Workflows
Recommended next step: Start with one simple automation—such as new lead → welcome email → follow-up sequence—before building a complex multi-branch funnel.
